


Did you know that over 70 percent of beginners wear the wrong waist trainer size on their first try? Finding a comfortable and effective waist trainer feels challenging, especially when sizing and positioning make all the difference. The right fit shapes your silhouette and supports your body safely. By understanding each key step before putting on a waist trainer, you can avoid discomfort, improve your results, and start your body shaping journey with confidence.
Table of Contents
- Step 1: Choose The Perfect Waist Trainer Size
- Step 2: Prepare Your Body And Waist Trainer
- Step 3: Position The Waist Trainer Correctly
- Step 4: Secure The Waist Trainer Comfortably
- Step 5: Check Fit For Comfort And Effectiveness
Quick Summary
| Key Point | Explanation |
|---|---|
| 1. Choose the right waist trainer size | Measure the narrowest part of your waist accurately to find your ideal size. Opt for the larger size if you’re between measurements for comfort. |
| 2. Prepare your body and waist trainer | Keep your skin clean and dry to avoid irritation. Inspect the trainer for any damage before wearing it for optimal results. |
| 3. Position the waist trainer correctly | Align the trainer around your midsection, starting just above your hips for balanced compression across your waistline. |
| 4. Secure the waist trainer comfortably | Fasten the trainer from the bottom up, ensuring a snug fit that allows for natural movement and breathing. |
| 5. Check fit for comfort and effectiveness | Perform gentle movements and deep breaths to ensure the trainer doesn’t pinch and allows free movement. Reassess if discomfort persists. |
Step 1: Choose the Perfect Waist Trainer Size
Choosing the right waist trainer size is crucial for achieving a stunning silhouette and ensuring maximum comfort. In this step, you will learn how to accurately measure your body and select the perfect waist trainer that fits like a glove.
According to atbuty, selecting the right waist trainer requires precise measurements. Start by standing straight and using a flexible tape measure to wrap around the narrowest part of your waist. Typically this is right above your navel. Ensure the tape is snug but not too tight. Take your time and measure twice to confirm accuracy.
As feelingirl recommends, if your measurements fall between two sizes, always choose the larger size. This ensures you have enough room for comfortable movement and prevents potential discomfort or pinching. Pro tip: wear minimal clothing when measuring to get the most accurate results.
Once you have your measurements, compare them carefully with the brand’s specific sizing chart. Remember that different brands might have slightly different sizing standards. If you are unsure, do not hesitate to reach out to customer service for personalized sizing advice. A well-fitted waist trainer can make all the difference in your body shaping journey.
Ready to find the perfect fit? Let’s dive into the world of waist trainer measurement and transform your silhouette with confidence. Learn more about different waist trainer types to complement your sizing knowledge.
Step 2: Prepare Your Body and Waist Trainer
Before putting on your waist trainer, proper preparation is key to ensuring comfort, effectiveness, and a smooth body shaping experience. This step will help you create the ideal conditions for wearing your waist trainer with confidence and ease.
According to chick active, the first rule of waist trainer preparation is maintaining clean and dry skin. Thoroughly wash and dry your torso, avoiding any lotions or oils that might create slippage or skin irritation. Consider wearing a thin, breathable undergarment as a protective layer between your skin and the trainer.
As curvesculpting recommends, start by adjusting your waist trainer to its loosest setting. This gradual approach allows your body to adapt and prevents potential discomfort. Take time to inspect the waist trainer for any damage or irregularities before wearing. A smooth, well maintained trainer will provide the best shaping results.
Pro tip: If you have sensitive skin, do a quick patch test with the waist trainer material to ensure no allergic reactions or excessive sweating occurs. Always listen to your body and remove the trainer if you experience any unusual discomfort.
Ready to transform your silhouette? Let’s explore different waist trainer styles that can complement your body shaping journey and help you achieve your desired look.
Step 3: Position the Waist Trainer Correctly
Positioning your waist trainer correctly is crucial for achieving the best body shaping results and ensuring maximum comfort. This step will guide you through the precise technique of placing your waist trainer to maximize its effectiveness and minimize potential discomfort.
According to curvesculpting, the key is to position the waist trainer around your midsection with perfect alignment. Start by carefully placing the bottom edge just above your hips, ensuring the trainer is centered with equal coverage on both sides. This balanced approach helps create smooth, consistent compression across your entire waistline.
As sugarshapewear recommends, begin fastening your waist trainer strategically. Position the hooks at the front and start closing them from the bottom hook, gradually working your way upward. This method allows you to adjust the fit progressively and ensure a snug yet comfortable fit that contours to your body’s natural shape.
Pro tip: Take a few deep breaths and move around slightly after positioning the waist trainer to confirm it feels comfortable and stays in place. If you experience any pinching or excessive discomfort, readjust the trainer or consider trying a different size.
Ready to elevate your body shaping journey? Explore our guide on different waist trainer types to find the perfect style that complements your body and fitness goals.
Step 4: Secure the Waist Trainer Comfortably
Securing your waist trainer correctly is the final critical step in achieving a comfortable and effective body shaping experience. Proper fastening ensures your trainer provides optimal compression while maintaining your freedom of movement and overall comfort.
According to curvesculpting, the key technique is to fasten the waist trainer methodically. Begin at the bottom hook and carefully work your way upward, ensuring each hook is securely connected. This gradual approach allows you to adjust the fit precisely and prevent any sudden tightness that might cause discomfort.
As sugarshapewear recommends, focus on creating a snug fit that allows for comfortable breathing and natural movement. The trainer should feel supportive without being restrictive. Take a moment to do some gentle movements stretch slightly to confirm the trainer moves with your body and doesnt pinch or create uncomfortable pressure points.
Pro tip: If you feel any significant discomfort or difficulty breathing, loosen the hooks or consider selecting a different size. Remember that a well fitted waist trainer should feel like a supportive second skin not a restrictive constraint.
Ready to explore more about perfecting your waist training journey? Check out our top waist trainer examples to find the ideal style for your body and fitness goals.
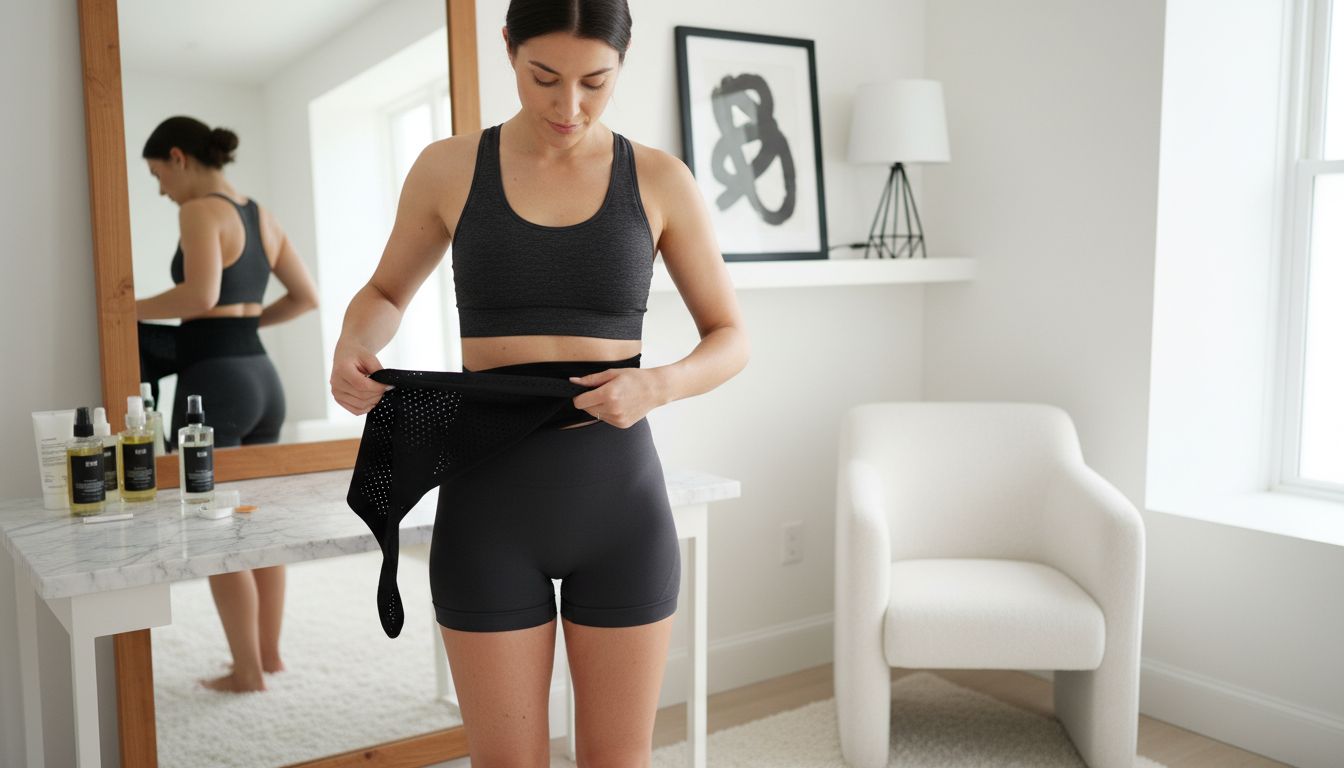
Step 5: Check Fit for Comfort and Effectiveness
After securing your waist trainer, the most crucial step is ensuring it provides the perfect balance of support and comfort. This final check will help you determine whether your waist trainer is functioning optimally and supporting your body shaping goals without causing unnecessary strain.
According to sugarshapewear, the first test involves standing tall and taking deep breaths. Your waist trainer should feel snug and supportive while allowing complete respiratory movement. Focus on maintaining good posture and observe how the trainer feels during natural breathing cycles. The key is achieving compression without compromising your ability to breathe freely and comfortably.
As curvesculpting recommends, perform a series of gentle movements to assess the trainer’s fit and stability. Walk around, bend slightly, and stretch to confirm the trainer stays securely in place without shifting or causing discomfort. Pay attention to any pinching sensations or areas of excessive pressure that might indicate improper sizing or positioning.
Pro tip: If you experience persistent discomfort shortness of breath or notice the waist trainer creates uneven compression or rolls up at the edges it may be time to reassess your size or style. A well fitted waist trainer should feel like a supportive second skin that moves harmoniously with your body.
![]()
Ready to explore more about perfecting your waist training technique? Discover our comprehensive guide to waist trainer styles to find your ideal body shaping solution.
Achieve Your Ideal Silhouette with the Perfect Waist Trainer
Struggling to find a waist trainer that fits comfortably and shapes your silhouette just right? This article highlights the importance of correct sizing, positioning, and secure fastening to avoid discomfort and enjoy stunning results. If you have faced challenges such as pinching, uneven compression, or breathing difficulty while training your waist, you are not alone. The key is a waist trainer that moves naturally with your body and enhances your confidence.
Discover a curated selection of premium waist trainers and shapewear designed to provide support, comfort, and flawless shaping at Saga Women. Whether you are starting your waist training journey or upgrading your collection, our Shapewear Bodyshaper category offers a range of expertly crafted styles to fit your unique needs and help you embrace your curves safely and stylishly.
Experience the difference of a perfectly fitted waist trainer today. Visit Saga Women now and select your ideal shapewear to complement your body shaping goals. Don’t wait to feel confident and comfortable in your own skin. Shop now and enjoy quick views, detailed descriptions, and easy returns designed just for you.
Frequently Asked Questions
How do I measure my waist for a waist trainer?
To measure your waist for a waist trainer, stand straight and wrap a flexible tape measure around the narrowest part of your waist, typically just above your navel. Ensure the tape is snug but not tight, and consider measuring twice for accuracy to choose the correct size.
What should I do to prepare my body before wearing a waist trainer?
Before putting on a waist trainer, ensure your skin is clean and dry. Wash and dry your torso, avoiding lotions or oils, and consider wearing a thin, breathable undergarment for added comfort.
How can I position my waist trainer correctly?
Position your waist trainer by placing the bottom edge just above your hips and centering it around your midsection. Fasten it by starting from the bottom hook and working your way upwards to achieve even compression across your waistline.
What steps should I take to secure my waist trainer comfortably?
To secure your waist trainer, start by fastening the bottom hook and gradually attach the hooks upwards. Focus on creating a fit that is snug yet supportive, allowing for comfortable breathing and natural movement.
How can I check if my waist trainer fits properly?
After securing your waist trainer, check the fit by standing tall and taking deep breaths. Ensure it feels supportive without restricting your ability to breathe or move; adjust if you encounter pinching or discomfort.
What do I do if my waist trainer feels uncomfortable?
If your waist trainer feels uncomfortable, loosen the hooks or consider trying a different size. A well-fitted trainer should feel like a supportive second skin, enabling easy movement without excessive pressure.

